Installing Livinity on DigitalOcean
Installing Livinity on DigitalOcean
Installing Livinity on DigitalOcean
Want Livinity running in the cloud on your own server, reachable from anywhere? DigitalOcean is one of the simplest places to do it. This guide walks you through it one click at a time — no prior cloud experience needed.
By the end you'll have your own LivOS server (the self-hosted edition of Livinity) running on a DigitalOcean "Droplet," linked to your Livinity account.
Screenshots: Each numbered slot below is a placeholder. Drop your image into the
media/folder using the filename shown, and it will appear here automatically.
Before you start
You'll need two things:
- A Livinity account — sign up free at livinity.io.
- A DigitalOcean account — you'll create one in Step 4 if you don't have it.
A quick word on cost. New DigitalOcean users get $200 in free credit, valid for 60 days — plenty to try this out for free. After that, the server we'll set up costs about $48 per month if you leave it running (or about $12/month for the smaller option). You can destroy it anytime — more on that at the end.
A bird's-eye view
Here's the whole journey, so you know what's coming:
- Open DigitalOcean and create a server (a "Droplet").
- Choose Ubuntu Linux and a size with enough memory.
- Set a password, then create it.
- Connect using your browser.
- Paste in one install command.
- Open your new server's address and finish setup.
There's no firewall to configure — the installer connects your server out through a secure tunnel, so you'll reach your dashboard at your own livinity.io address. Let's go.
1. Open your dashboard
Sign in at livinity.io, click your name in the top-right corner, then click Dashboard.
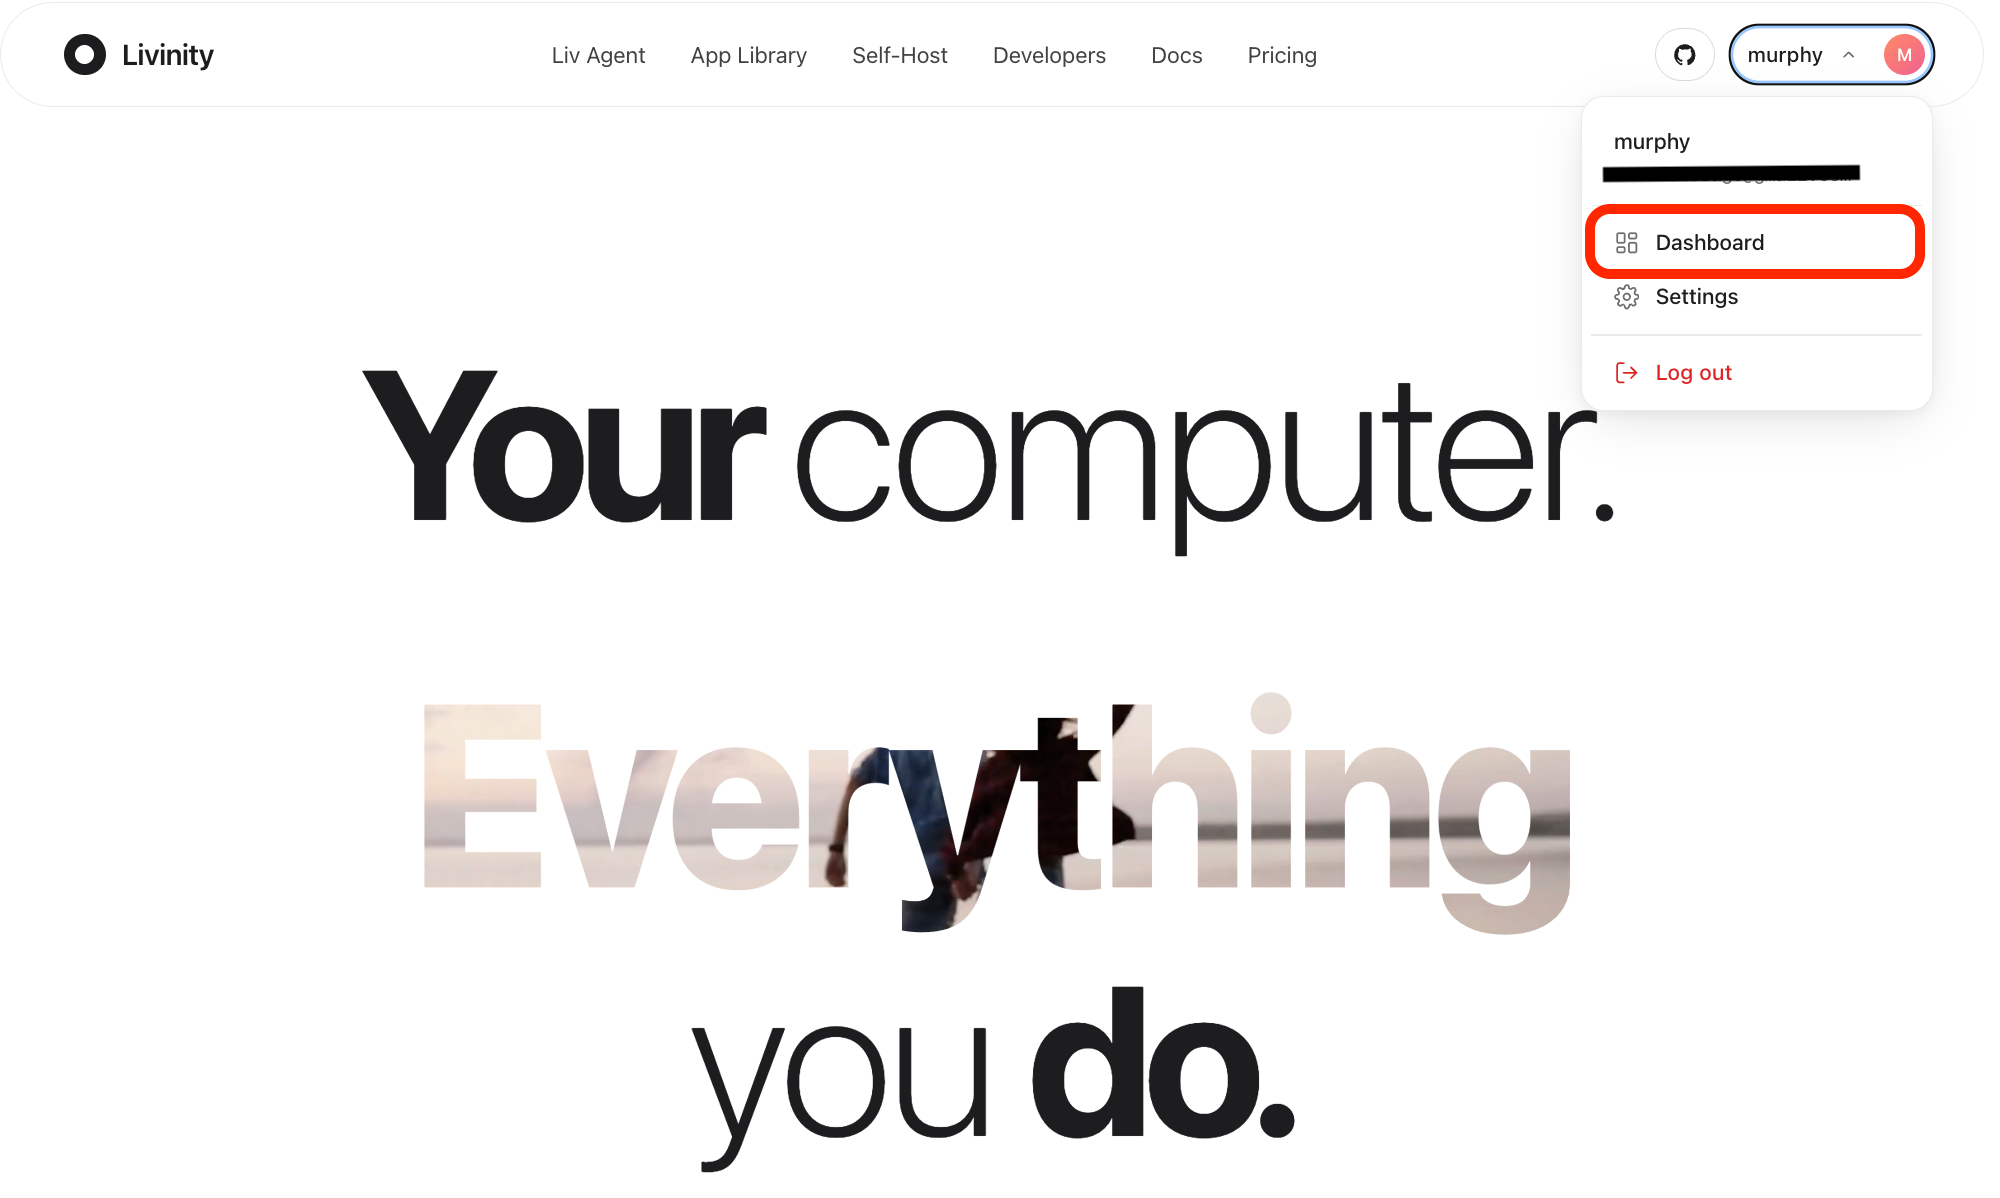
2. Go to the Install page
On your dashboard, click Install in the top menu.
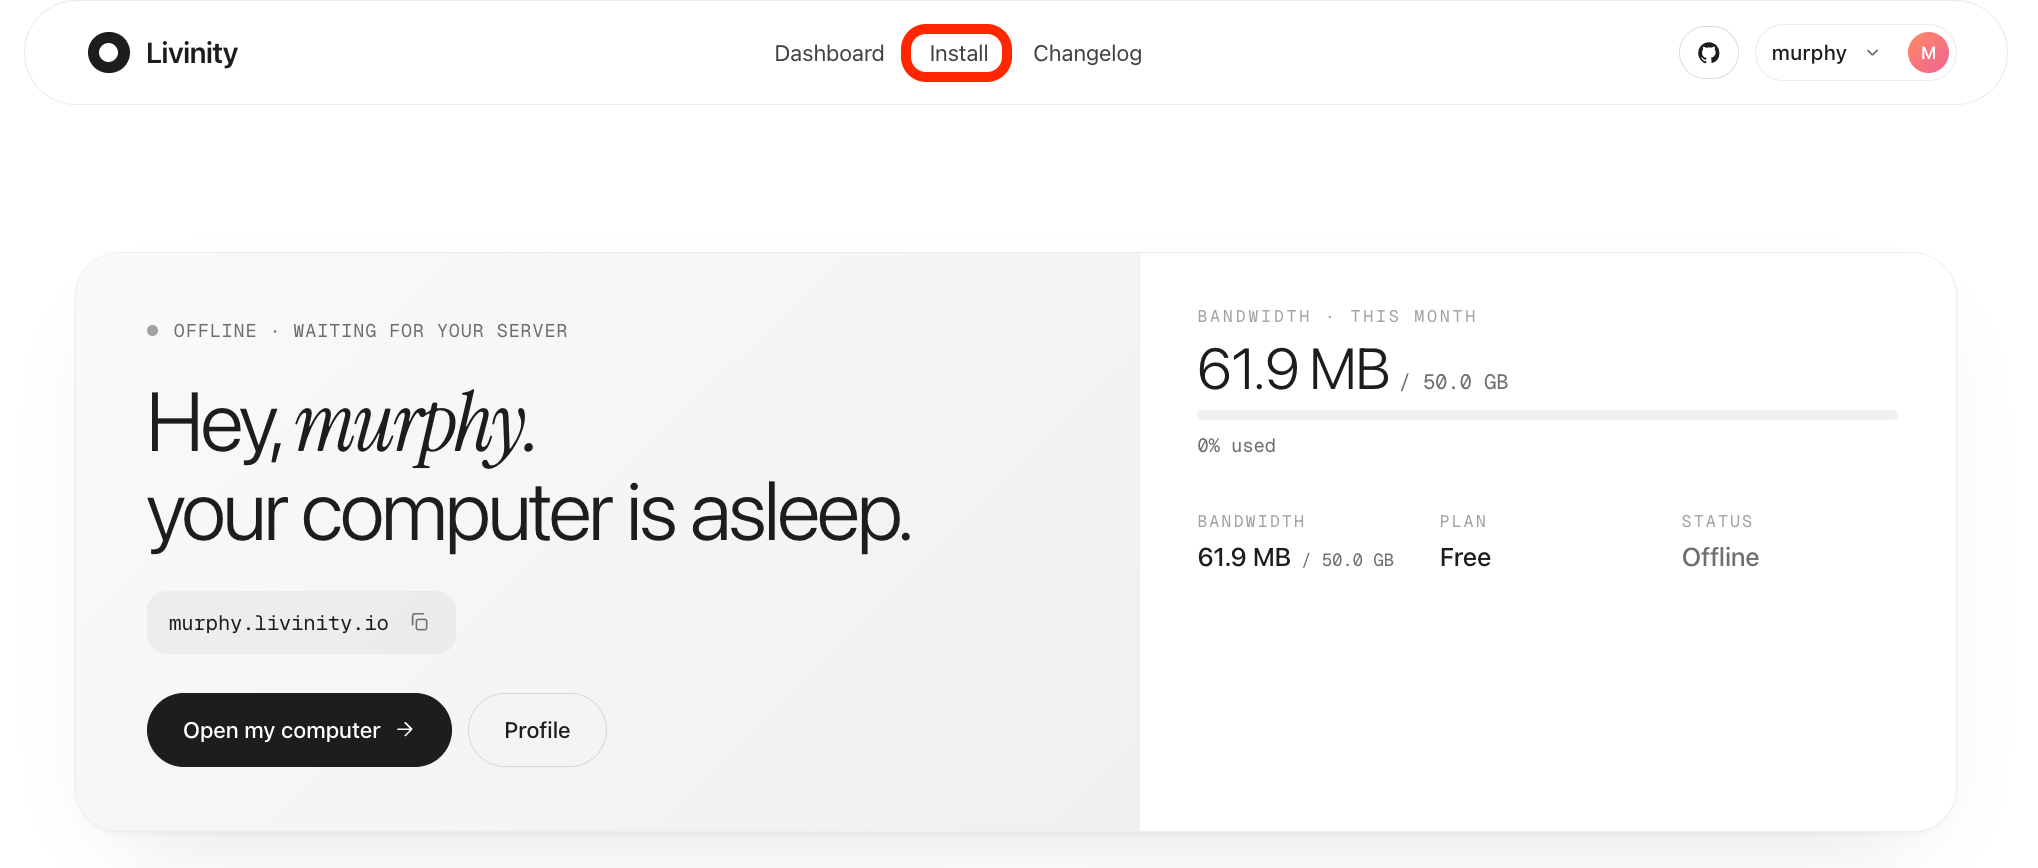
3. Copy your install command
On the "Set up your first LivOS" page, click Copy to grab your one-line command. It already has your private install key built in.
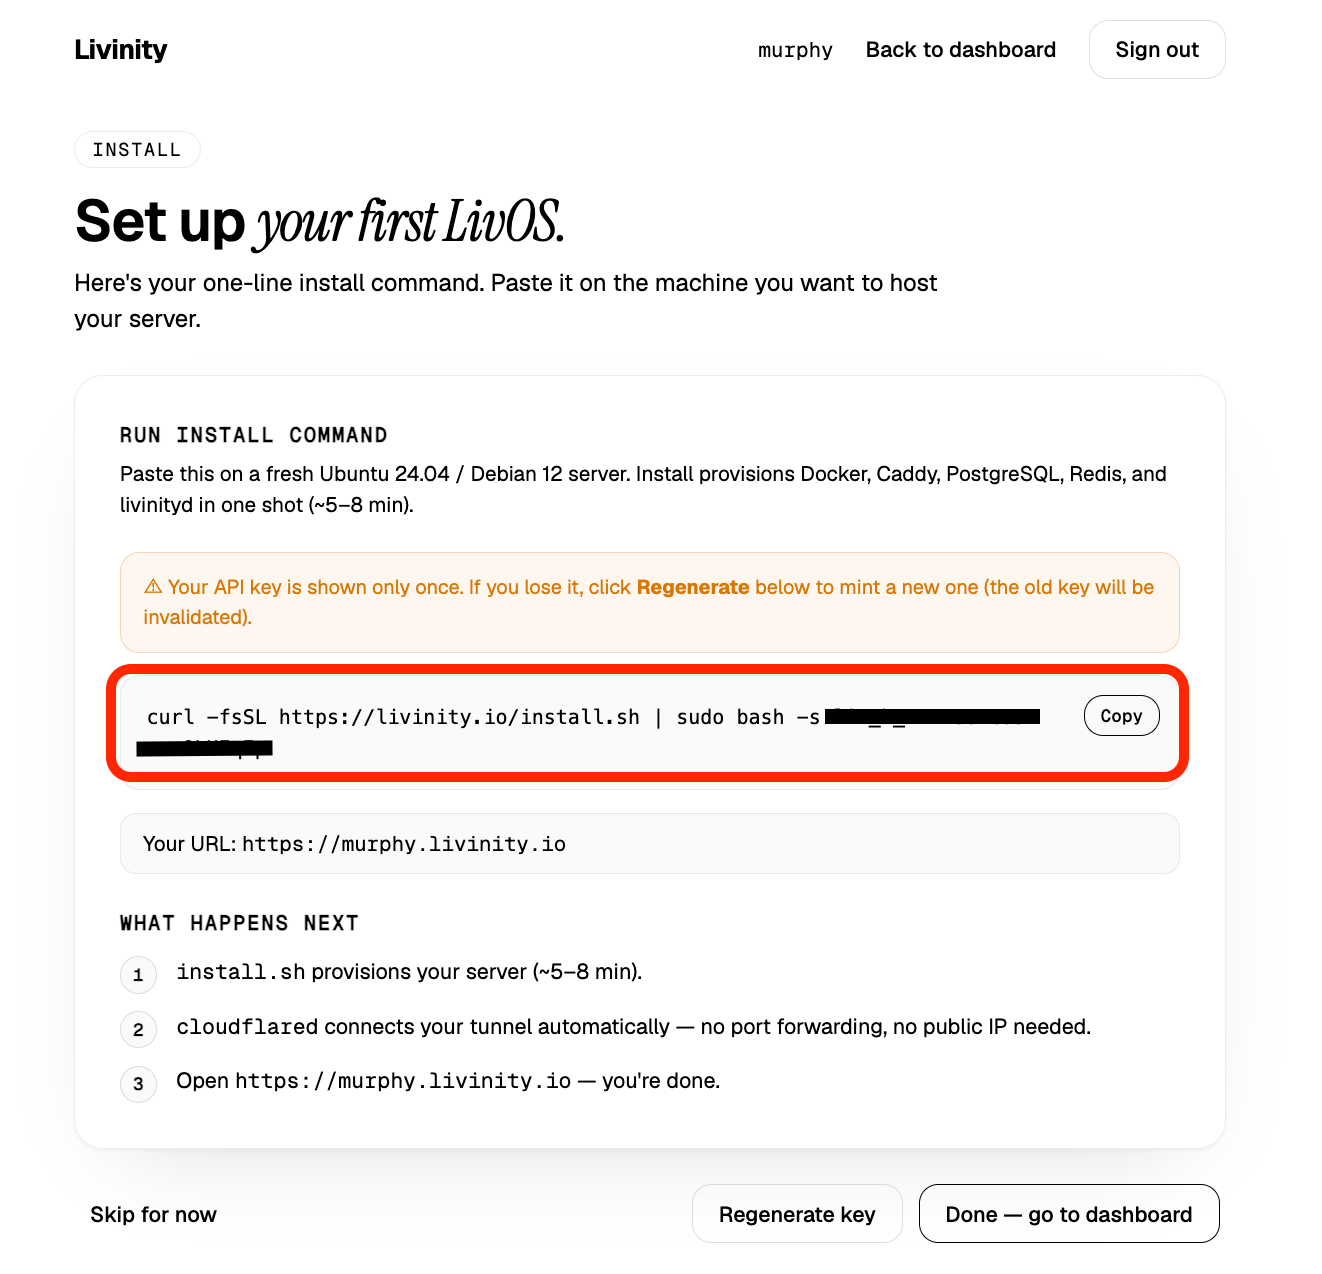
Heads up: your key is shown only once. If you lose it, click Regenerate key to make a new one — the old one stops working.
Your command looks like this:
curl -fsSL https://livinity.io/install.sh | sudo bash -s YOUR-INSTALL-KEY
4. Sign in to DigitalOcean
Go to digitalocean.com and sign up (or sign in). New accounts get the $200 credit automatically after you verify your email and add a payment method. Once you're in, you'll land on the control panel.
📸 Screenshot 01 — The DigitalOcean control panel Show the main DigitalOcean dashboard after signing in.

5. Create a Droplet
Click the green Create button at the top right and choose Droplets.
📸 Screenshot 02 — Create → Droplets Show the "Create" menu open with "Droplets" highlighted.

This opens a single setup page. We'll go through it top to bottom.
6. Choose a location
Pick a datacenter region close to you (for example, New York, Amsterdam, or Singapore). This is where your server will physically live.
📸 Screenshot 03 — Choosing a region Show the region/datacenter selection.

7. Choose Ubuntu
Under Choose an image, make sure Ubuntu is selected, with version 24.04 (LTS). This is the operating system Livinity runs on.
📸 Screenshot 04 — Selecting Ubuntu Show Ubuntu 24.04 LTS selected as the image.

8. Choose a size
Under Droplet Type, keep Basic. Under CPU options, keep Regular, then pick a size:
- Recommended: the 8 GB / 4 vCPU plan — runs Livinity comfortably (about $48/month).
- Budget option: the 2 GB / 1 vCPU plan — the bare minimum (about $12/month). Fine for trying things out, slower for real use.
Storage is already included in the plan, so there's nothing extra to set up here.
📸 Screenshot 05 — Choosing a size Show the Basic plan with the 8 GB size selected.

9. Set a password
Under Choose Authentication Method, pick Password, then create a strong root password and note it down — you'll use it to log in.
(SSH keys are a more secure option if you're comfortable with them, but a password is the simplest way to get started.)
📸 Screenshot 06 — Setting a password Show the Password authentication option with a password entered.

10. Create it
Scroll down and click the big Create Droplet button. After about a minute,
your server appears with a green dot and a public IP address (a number like
164.92.x.x).
📸 Screenshot 07 — Your Droplet is ready Show the new Droplet in the list with its IP address and green status.

11. Connect to your server
Click your Droplet's name to open it, then click Console (or Launch Droplet Console). A terminal window opens right in your browser.
📸 Screenshot 08 — The Console button Show the Droplet page with the "Console" button highlighted.

When the terminal asks for a login, type root, press Enter, then enter the
password you set in Step 9.
📸 Screenshot 09 — The browser terminal Show the browser console logged in and ready for a command.

12. Install Livinity
Paste the command you copied in Step 3 into the terminal window and press Enter.
📸 Screenshot 10 — Running the install command Show the install command pasted into the terminal and running.

The installer sets up everything Livinity needs — Docker, the database, and the web server — then starts it as a background service. This takes a few minutes. When it's done, you'll see a confirmation.
13. Open your dashboard
When the installer finishes, it shows your personal address — it will be your
own https://<your-username>.livinity.io. Open that in a browser.
📸 Screenshot 11 — The installer's finish message Show the end of the install with your livinity.io address.

You'll be welcomed by the LivOS setup wizard. Create your admin account, follow the prompts, and you're done — your own Livinity, running in the cloud!
📸 Screenshot 12 — The LivOS setup wizard Show the LivOS onboarding/setup screen in the browser.

Because your server connects out through a secure tunnel, you reach it at your livinity.io address — no firewall settings to configure.
Managing cost (important!)
Your server keeps billing until you remove it. Two things are worth knowing:
- Set a billing alert. In Settings → Billing, set a monthly billing alert so DigitalOcean emails you before you spend more than you expect.
📸 Screenshot 13 — Setting a billing alert Show the Billing settings with a monthly alert configured.

- Powering off is not enough. Unlike some clouds, a DigitalOcean Droplet keeps billing even when it's powered off, because the resources stay reserved. To actually stop charges, destroy the Droplet (in its menu, choose Destroy). If you want to keep your data first, take a snapshot before destroying.
📸 Screenshot 14 — Destroying a Droplet Show the Droplet's "Destroy" option.

Troubleshooting
| What's happening | What to try |
|---|---|
| The dashboard won't load at your address yet | Give the install a couple more minutes to finish setting up the tunnel, then refresh. Make sure you're using your username.livinity.io address. |
| The console won't accept your login | The username is root (all lowercase). Re-enter the password from Step 9 carefully — nothing shows on screen as you type, which is normal. |
| "Permission denied" when installing | The copied command already works as the root user, so just paste it exactly as given. |
| Your server didn't appear in your Livinity dashboard | Double-check you used your personal install command with your install key, copied from the dashboard's install page. |
| Worried about cost | Destroy the Droplet when you're done (snapshot first if you want to keep your data), and set a billing alert. |
Still stuck? Reach out to support and we'll help you get it running.
Prefer not to manage a server at all?
You don't have to run your own server. If this feels like more than you need, you can use Livinity in the cloud at livinity.io — no setup required, and you can always move to your own server later.