Installing Livinity on Hetzner
Installing Livinity on Hetzner (the cheapest option)
Installing Livinity on Hetzner (the cheapest option)
Want your own Livinity server in the cloud without paying much for it? Hetzner is the most affordable way to do it — a capable server runs around €8 per month, a fraction of what the big clouds charge. This guide walks you through it one click at a time.
By the end you'll have your own LivOS server (the self-hosted edition of Livinity) running on Hetzner, linked to your Livinity account.
Screenshots: Each numbered slot below is a placeholder. Drop your image into the
media/folder using the filename shown, and it will appear here automatically.
Before you start
You'll need two things:
- A Livinity account — sign up free at livinity.io.
- A Hetzner Cloud account — sign up at console.hetzner.cloud.
A quick word on cost. Hetzner doesn't have a free tier, but it's cheap: the server we'll set up (8 GB of memory) costs about €8/month, and a smaller 4 GB one is about €4.50/month. You're billed by the hour up to that monthly cap, so you only pay for the time it runs.
About ARM: We'll use Hetzner's ultra-cheap Arm servers. Livinity runs fine on Arm — the dashboard and the Liv assistant all work. A small number of apps in the App Library are built only for Intel/AMD chips and may not install; if you hit that, you can re-create the server on one of Hetzner's Intel/AMD plans instead.
A bird's-eye view
Here's the whole journey:
- Open Hetzner and create a server.
- Choose Ubuntu Linux and an Arm size with enough memory.
- Create it, then connect using your browser.
- Paste in one install command.
- Open your new address and finish setup.
Let's go.
1. Open your dashboard
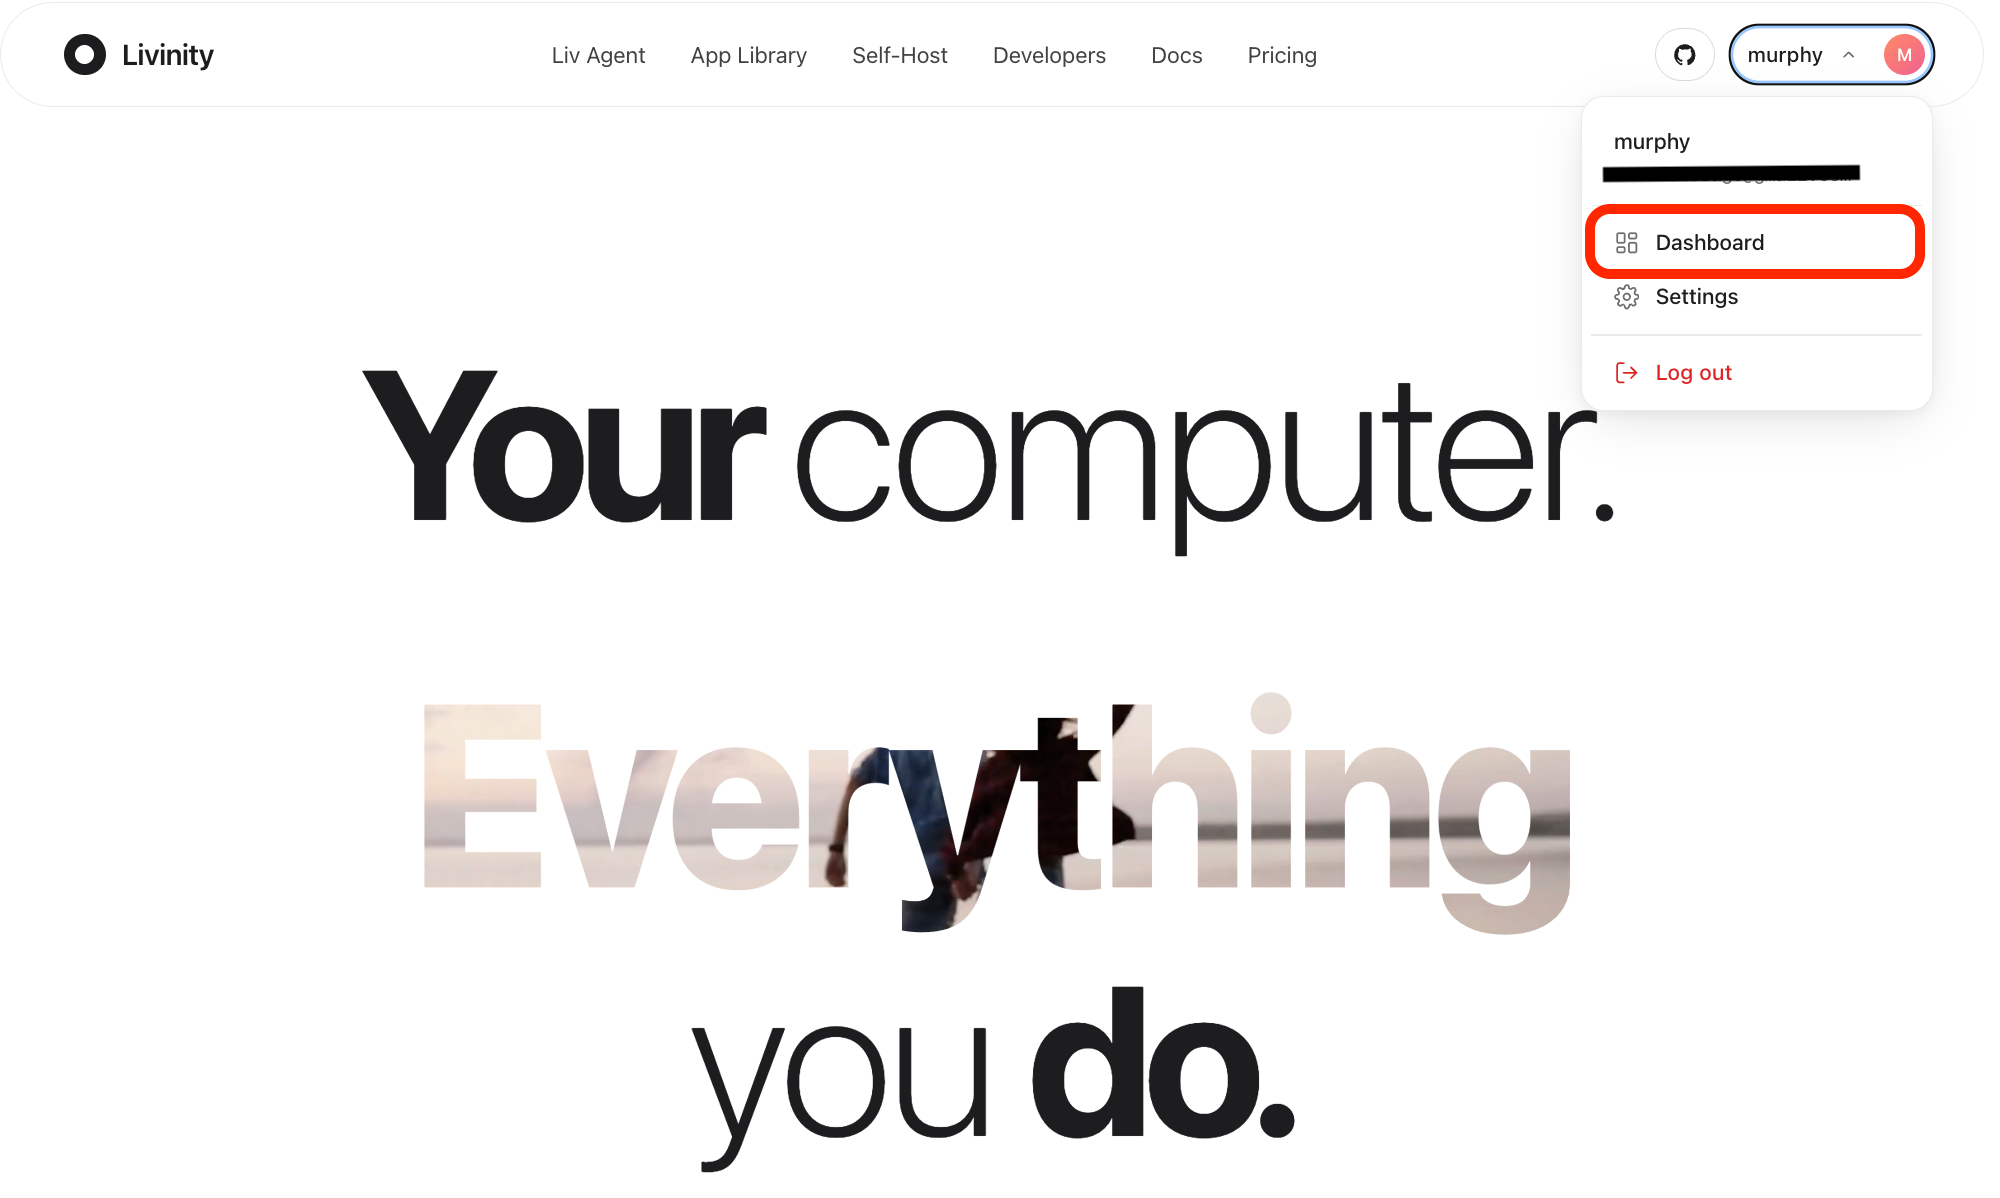
Sign in at livinity.io, click your name in the top-right corner, then click Dashboard.
2. Go to the Install page
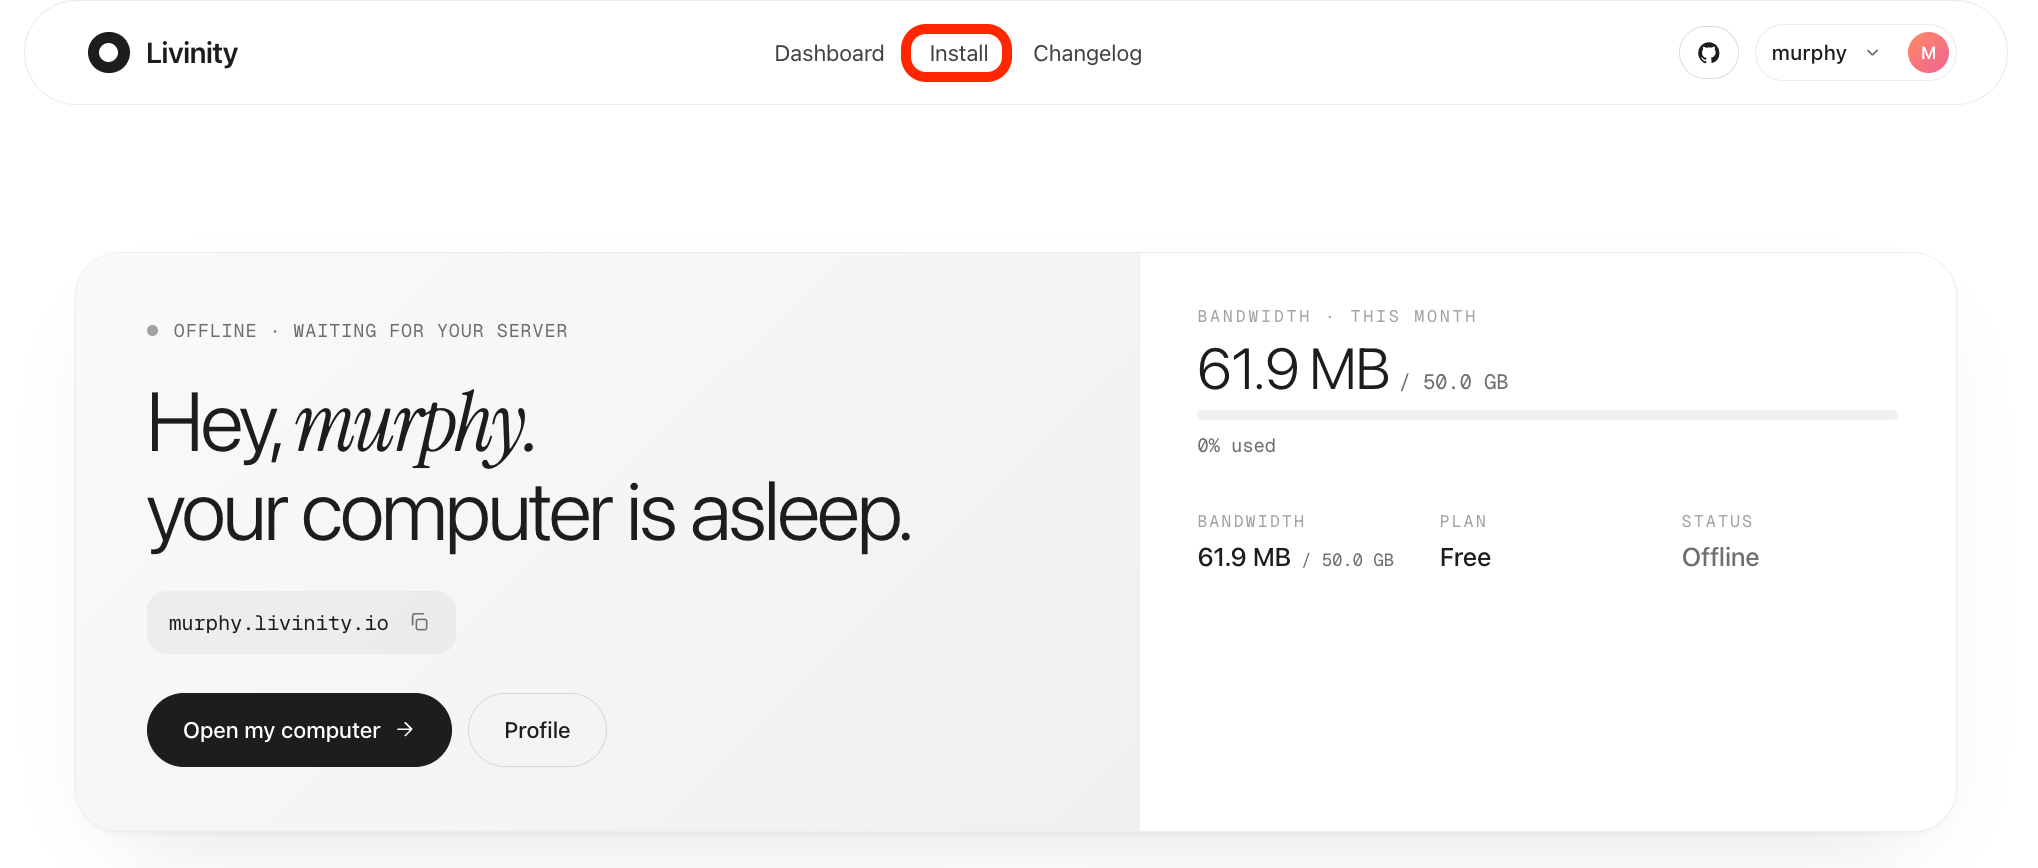
On your dashboard, click Install in the top menu.
3. Copy your install command
On the "Set up your first LivOS" page, click Copy to grab your one-line command. It already has your private install key built in.
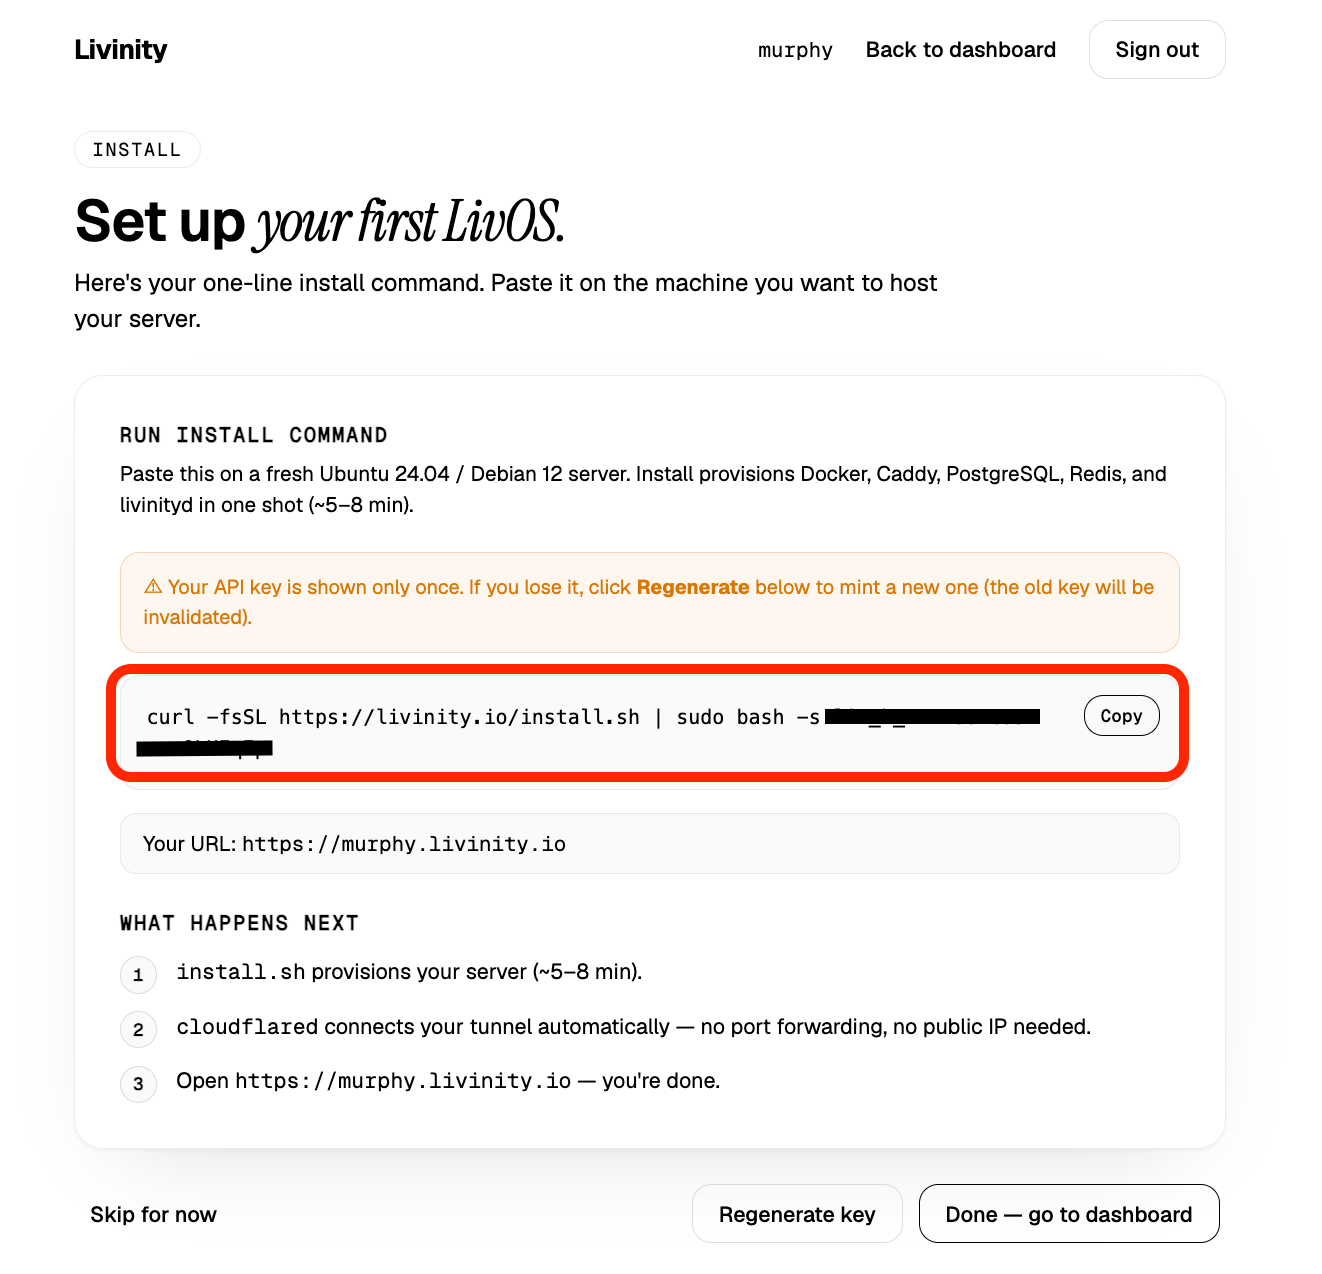
Heads up: your key is shown only once. If you lose it, click Regenerate key to make a new one — the old one stops working.
Your command looks like this:
curl -fsSL https://livinity.io/install.sh | sudo bash -s YOUR-INSTALL-KEY
4. Sign in and create a project
Sign in at console.hetzner.cloud. If it's
your first time, create a project (call it something like livinity) and open
it.
📸 Screenshot 01 — Your Hetzner project Show the Hetzner Cloud console with a project open.

5. Add a server
Click the Add Server button (or the + in the Servers section).
📸 Screenshot 02 — The "Add Server" button Show the Servers page with the "Add Server" button.

This opens a single setup page. We'll go through it top to bottom.
6. Choose a location
Pick a location close to you (for example, Falkenstein or Nuremberg in Germany, or Helsinki in Finland — Hetzner's Arm servers live in these European locations).
📸 Screenshot 03 — Choosing a location Show the location selection.

7. Choose Ubuntu
Under Image, choose Ubuntu, version 24.04. This is the operating system Livinity runs on.
📸 Screenshot 04 — Selecting Ubuntu Show Ubuntu 24.04 selected as the image.

8. Choose an Arm size
Under Type, switch to the Arm64 (Ampere) tab, then pick a size:
- Recommended: CAX21 — 4 cores, 8 GB of memory (about €8/month).
- Budget option: CAX11 — 2 cores, 4 GB of memory (about €4.50/month).
Storage is already included, so there's nothing extra to set up.
📸 Screenshot 05 — Choosing an Arm size Show the Arm64 (Ampere) tab with CAX21 selected.

9. Set how you'll log in
Scroll to the bottom. If you have an SSH key, add it here. If you'd rather keep it simple, leave SSH keys empty — Hetzner will email you a root password after the server is created. Either way works.
📸 Screenshot 06 — Login setup Show the SSH key / access section near the bottom of the form.

10. Create it
Click the big Create & Buy now button. After a few seconds your server
appears with a public IP address (a number like 91.99.x.x).
📸 Screenshot 07 — Your server is ready Show the new server in the list with its IP address.

11. Connect to your server
Open your server, then click the Console button (the >_ icon) in the top
right. A terminal window opens right in your browser.
📸 Screenshot 08 — The Console button Show the server page with the
>_Console button highlighted.

When it asks you to log in, type root, press Enter, then enter the password
(the one you set, or the one Hetzner emailed you). The first time, it may ask you
to set a new password — just follow the prompts.
📸 Screenshot 09 — The browser terminal Show the browser console logged in and ready.

12. Install Livinity
Paste the command you copied in Step 3 into the terminal window and press Enter.
📸 Screenshot 10 — Running the install command Show the install command pasted into the terminal and running.

The installer sets up everything Livinity needs and connects your server to your account through a secure tunnel. This takes a few minutes.
13. Open your dashboard
When the installer finishes, it shows your personal address — it will be your
own https://<your-username>.livinity.io. Open that in a browser.
📸 Screenshot 11 — The installer's finish message Show the end of the install with your livinity.io address.

You'll be welcomed by the LivOS setup wizard. Create your admin account, follow the prompts, and you're done — your own Livinity, running cheaply in the cloud!
📸 Screenshot 12 — The LivOS setup wizard Show the LivOS onboarding/setup screen in the browser.

Because your server connects out through a secure tunnel, you reach it at your livinity.io address — no firewall settings to configure.
Managing cost
Hetzner bills by the hour up to the monthly cap, and deleting the server is the only way to stop charges (a powered-off server still bills, because the resources stay reserved).
- To pause spending, open the server's menu and choose Delete.
- If you want to keep your data first, create a snapshot, then delete (small snapshot storage fees apply).
📸 Screenshot 13 — Deleting a server Show the server's menu with the Delete option.

Troubleshooting
| What's happening | What to try |
|---|---|
| Your dashboard address doesn't load yet | Give the install a couple more minutes to finish setting up the tunnel, then refresh. |
| The console won't accept your login | The username is root (all lowercase). Use the password you set or the one Hetzner emailed you. |
| An app from the library won't install | A few apps are Intel/AMD-only. The core platform still works; for those specific apps, re-create the server on a Hetzner Intel (CX) or AMD (CPX) plan. |
| Your server didn't appear in your Livinity dashboard | Double-check you used your personal install command with your install key, copied from the dashboard's install page. |
| Worried about cost | Delete the server when you're done (snapshot first if you want to keep your data). |
Still stuck? Reach out to support and we'll help you get it running.
Prefer not to manage a server at all?
You don't have to run your own server. If this feels like more than you need, you can use Livinity in the cloud at livinity.io — no setup required, and you can always move to your own server later.