Installing Livinity on Oracle Cloud (free, forever)
Installing Livinity on Oracle Cloud (free, forever)
Installing Livinity for Free (Oracle Cloud, forever)
Want to run your own Livinity server in the cloud for free — permanently? Oracle Cloud has an "Always Free" tier that never expires, generous enough to run Livinity comfortably at no cost. This guide walks you through it one step at a time.
By the end you'll have your own LivOS server (the self-hosted edition of Livinity) running for free on Oracle Cloud, linked to your Livinity account.
Screenshots: Each numbered slot below is a placeholder. Drop your image into the
media/folder using the filename shown, and it will appear here automatically.
Before you start
You'll need two things:
- A Livinity account — sign up free at livinity.io.
- An Oracle Cloud account — sign up at cloud.oracle.com. Oracle asks for a card to confirm you're a real person, but it won't charge you for Always Free resources.
A quick word on cost. Oracle's Always Free Arm tier gives you 2 cores and 12 GB of memory plus up to 200 GB of storage, free for as long as your account stays active. That's comfortably more than Livinity needs, so this setup costs $0.
Two things to know going in:
- It's Arm. Livinity runs fine on Arm — the dashboard and Liv assistant all work. A few apps in the App Library are Intel/AMD-only and may not install.
- "Out of capacity" is common. Oracle's free Arm servers are popular, so you may see an "out of capacity" message when creating one. It's not an error on your end — just try a different availability domain, or try again later. More on this below.
A bird's-eye view
Here's the whole journey:
- Sign up for Oracle Cloud and pick a home region.
- Create a free Arm server running Ubuntu.
- Connect to it.
- Paste in one install command.
- Open your new address and finish setup.
Let's go.
1. Open your dashboard
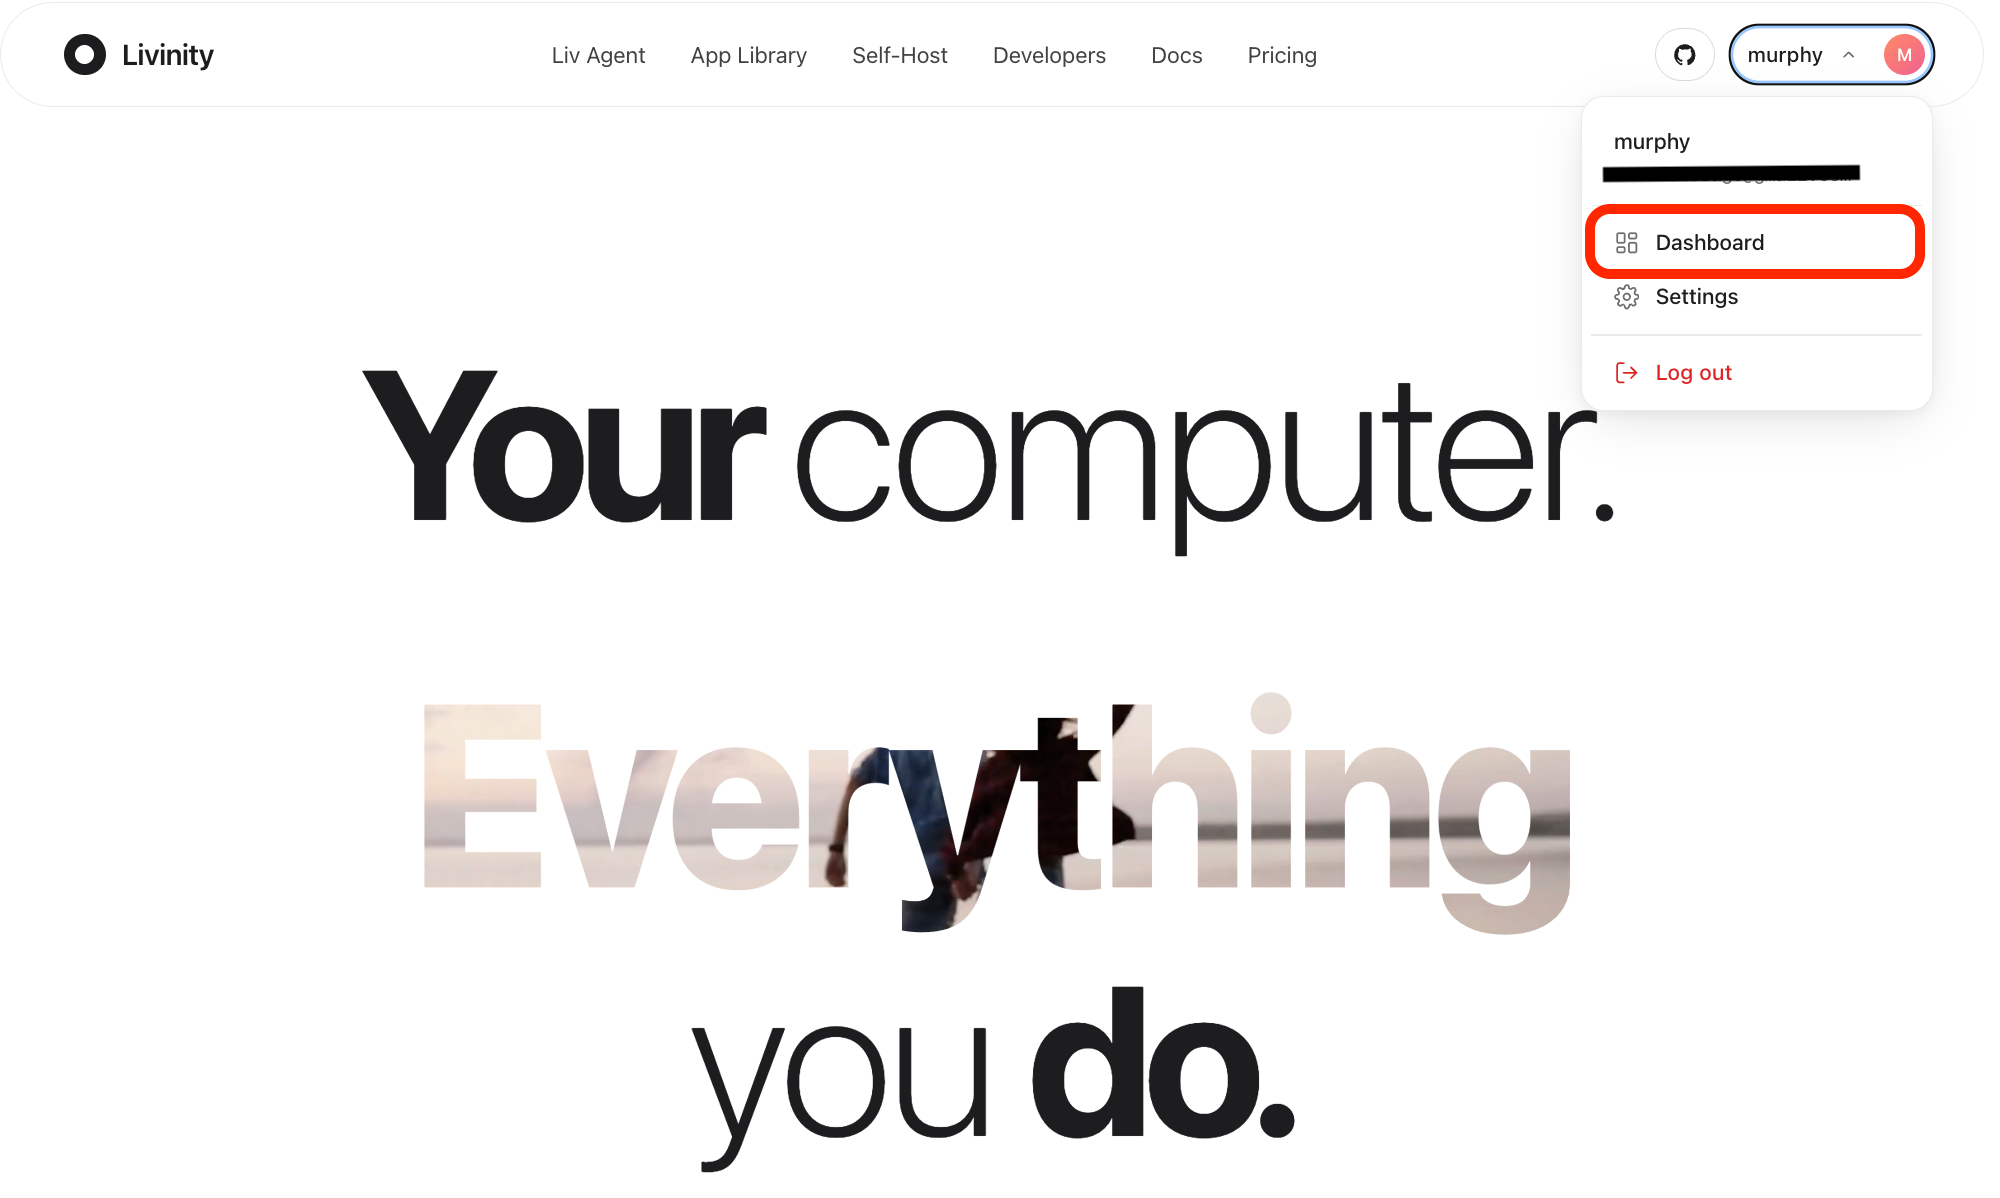
Sign in at livinity.io, click your name in the top-right corner, then click Dashboard.
2. Go to the Install page
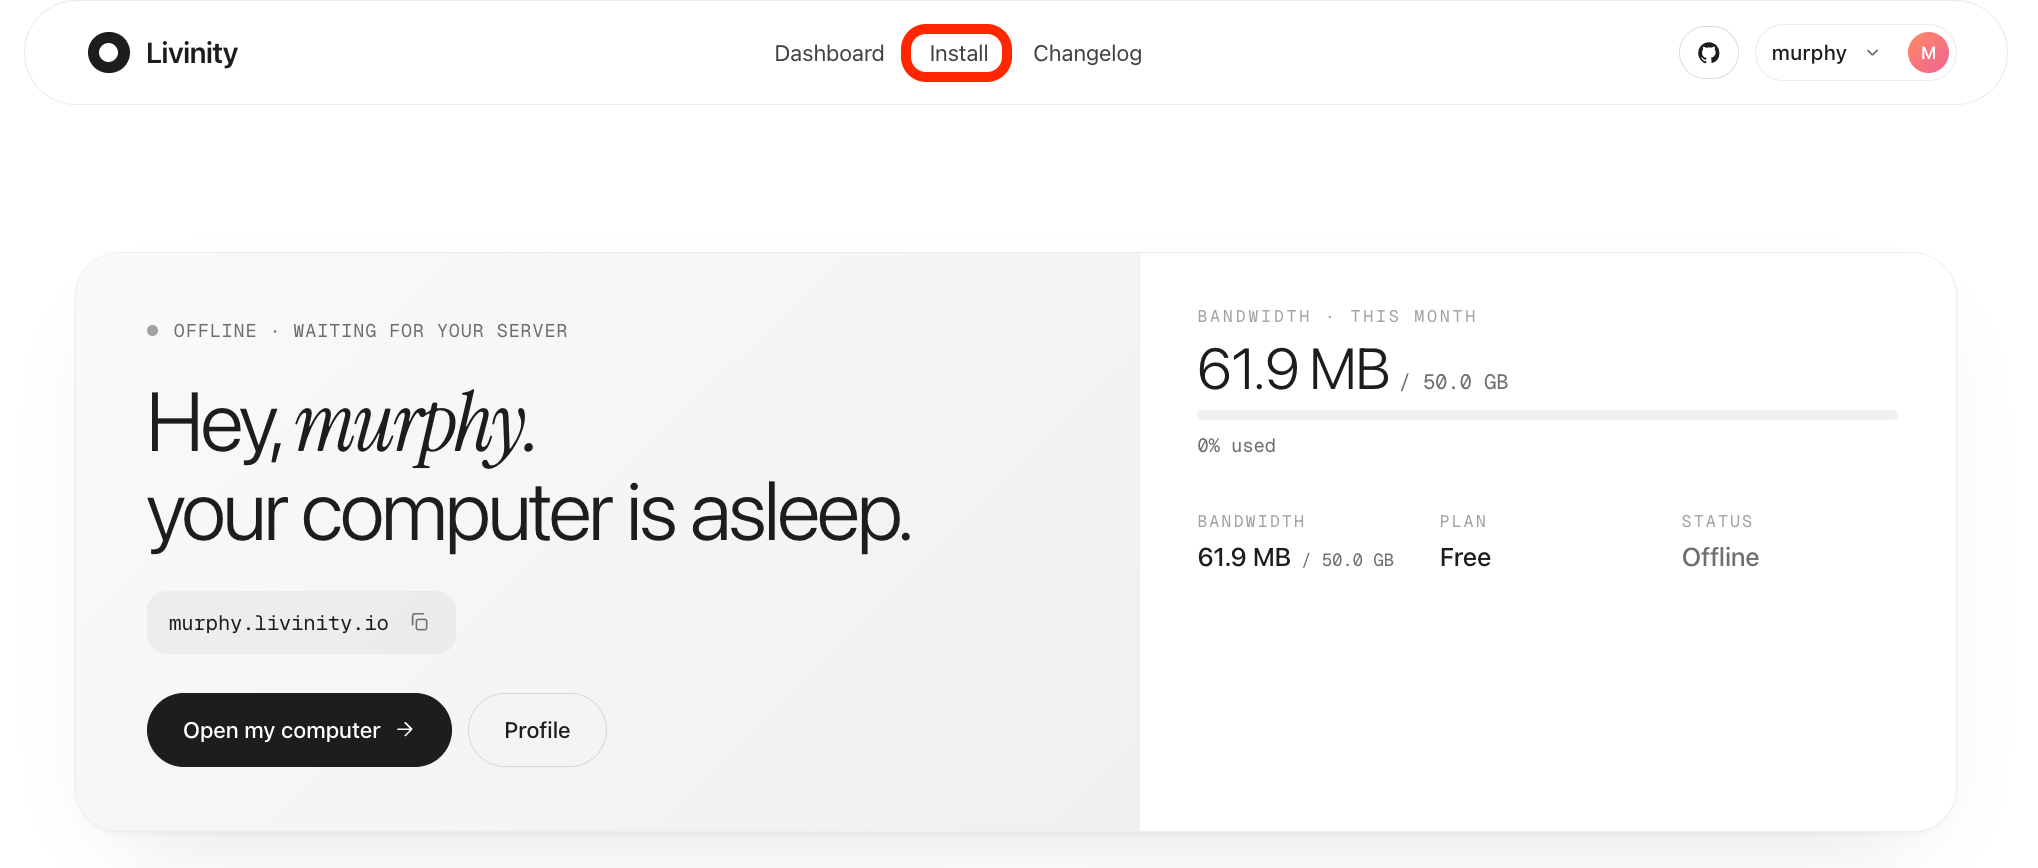
On your dashboard, click Install in the top menu.
3. Copy your install command
On the "Set up your first LivOS" page, click Copy to grab your one-line command. It already has your private install key built in.
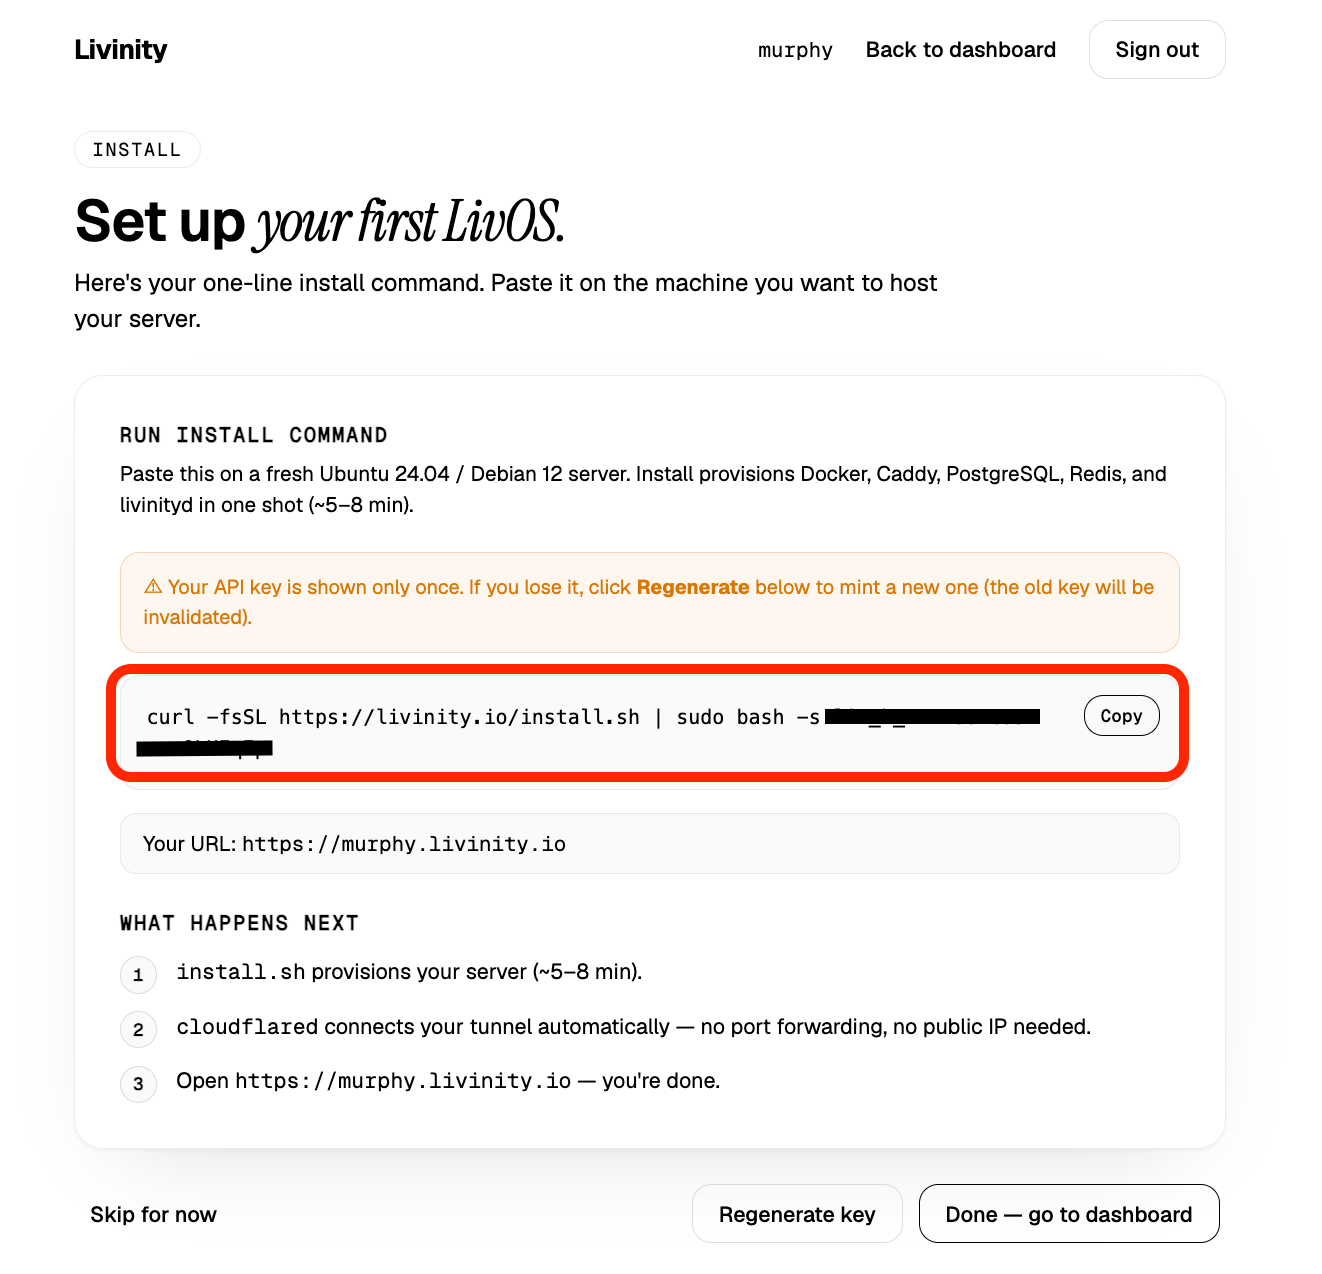
Heads up: your key is shown only once. If you lose it, click Regenerate key to make a new one — the old one stops working.
Your command looks like this:
curl -fsSL https://livinity.io/install.sh | sudo bash -s YOUR-INSTALL-KEY
4. Sign up and choose your region
Sign up at cloud.oracle.com. During sign-up you choose a home region — and this matters, because your free Arm server can only live there, and you can't change it later. Larger regions (like a nearby major city) tend to have better free-Arm availability.
📸 Screenshot 01 — The Oracle Cloud console Show the main Oracle Cloud Console (dashboard) after signing in.

5. Create a compute instance
In the search bar at the top, type Instances and open Compute → Instances, then click Create instance.
📸 Screenshot 02 — The "Create instance" button Show the Compute Instances page with the "Create instance" button.

6. Name it and choose Ubuntu
Give it a name like livinity-server. Then, under Image, click Edit
(or Change image), choose Canonical Ubuntu, pick 24.04, and confirm.
📸 Screenshot 03 — Choosing the Ubuntu image Show the image picker with Canonical Ubuntu 24.04 selected.

7. Choose the free Arm shape
Still on the create page, find the Shape section and click Edit / Change shape. Then:
- Choose the Ampere series.
- Select VM.Standard.A1.Flex.
- Set it to 2 OCPUs and 12 GB of memory (the full free amount).
Anything marked "Always Free eligible" stays free.
📸 Screenshot 04 — Choosing the Ampere (Arm) shape Show the shape picker with Ampere VM.Standard.A1.Flex and 2 OCPU / 12 GB set.

8. Add your login key
Oracle uses SSH keys to log in. The easiest path: choose Generate a key pair for me and click Save private key to download it — keep that file safe, you'll need it to connect.
📸 Screenshot 05 — Saving your SSH key Show the SSH keys section with "Generate a key pair" and the download button.

9. Create it
Click Create at the bottom and wait a minute for the server to start.
If you see "Out of capacity": the free Arm pool in your region is temporarily full. Open the Placement section and try a different availability domain (AD-1, AD-2, AD-3), or simply try again a bit later — capacity frees up regularly.
📸 Screenshot 06 — Your server is running Show the instance details page with the instance in the "Running" state.

When it's running, note the Public IP address shown on the instance page.
📸 Screenshot 07 — Your server's public IP Show the instance details with the Public IP address visible.

10. Connect to your server
Click Cloud Shell (the terminal icon at the top of the console) to open a browser terminal, then connect to your server using the key you saved and its public IP:
ssh -i your-key.key ubuntu@<your-public-ip>
(Type yes if it asks whether to trust the server the first time. The login user
is ubuntu.)
📸 Screenshot 08 — Connecting in the terminal Show the Cloud Shell connected to the server as the ubuntu user.

11. Install Livinity
Paste the command you copied in Step 3 into the terminal window and press Enter.
📸 Screenshot 09 — Running the install command Show the install command pasted into the terminal and running.

The installer sets up everything Livinity needs and connects your server to your account through a secure tunnel. This takes a few minutes.
12. Open your dashboard
When the installer finishes, it shows your personal address — it will be your
own https://<your-username>.livinity.io. Open that in a browser.
📸 Screenshot 10 — The installer's finish message Show the end of the install with your livinity.io address.

You'll be welcomed by the LivOS setup wizard. Create your admin account, follow the prompts, and you're done — your own Livinity, running for free!
📸 Screenshot 11 — The LivOS setup wizard Show the LivOS onboarding/setup screen in the browser.

Because your server connects out through a secure tunnel, you reach it at your livinity.io address — so there's no need to wrestle with Oracle's firewall settings for web access.
Keeping it free
- Stay within the free amounts. As long as your Arm server uses 2 cores / 12 GB or less, and you don't add paid extras, you stay at $0.
- Always Free doesn't expire as long as your account stays active and in good standing.
- Avoid adding paid services by accident — anything not marked "Always Free eligible" can cost money.
Troubleshooting
| What's happening | What to try |
|---|---|
| "Out of capacity" when creating the server | Try a different availability domain under Placement, or try again later — this is Oracle's free-Arm demand, not a mistake on your end. |
| Your dashboard address doesn't load yet | Give the install a couple more minutes to finish setting up the tunnel, then refresh. |
| The SSH connection is refused | Make sure you're using the key you downloaded, the ubuntu username, and the server's public IP. |
| An app from the library won't install | A few apps are Intel/AMD-only. The core platform still works; those specific apps just aren't available on Arm. |
| Your server didn't appear in your Livinity dashboard | Double-check you used your personal install command with your install key, copied from the dashboard's install page. |
Still stuck? Reach out to support and we'll help you get it running.
Prefer not to manage a server at all?
You don't have to run your own server. If this feels like more than you need, you can use Livinity in the cloud at livinity.io — no setup required, and you can always move to your own server later.