Setting Up Livinity (First-Time Onboarding)
Setting Up Livinity (First-Time Onboarding)
Setting Up Livinity (First-Time Onboarding)
The very first time you open your Livinity — right after you finish installing it — a short setup wizard walks you through getting everything ready. It takes about two minutes, and this guide shows you exactly what to expect at each step.
This is the same whether you installed Livinity on your own computer or on a cloud server. When the wizard appears, you're in the right place — let's get you set up.
Screenshots: Each numbered slot below is a placeholder. Drop your image into the
media/folder using the filename shown, and it will appear here automatically.
Step 1 — Welcome
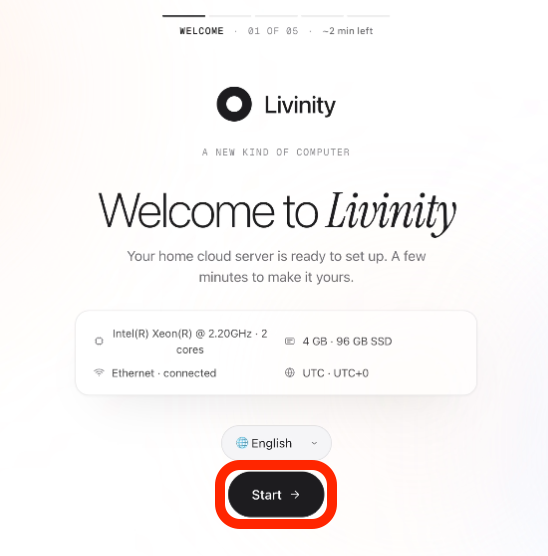
First you'll see a welcome screen that introduces Livinity and shows a quick snapshot of your new computer — its processor, memory, and storage. Have a look, then continue.
Step 2 — Create your account
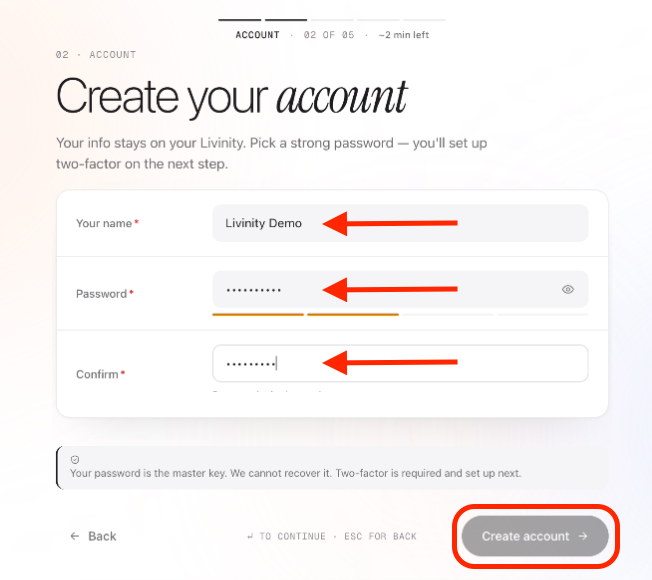
This is your admin account — the main account for your Livinity.
Your name and password. Enter your name and choose a strong password. As you type, Livinity checks your password and warns you if it's weak or easy to guess.
Important: Your password is the master key to your Livinity, and it can't be recovered if you lose it. Pick something strong and unique, and keep it somewhere safe.
Set up two-factor authentication. For your security, two-factor is required. Open an authenticator app on your phone — Google Authenticator, Authy, 1Password, or similar — scan the QR code on screen, then type in the 6-digit code the app gives you.
Keep your authenticator safe. You'll use it every time you sign in. If you ever lose access to it, you'll need to recover through your Livinity, so don't remove the app without setting it up again first.
Step 3 — Choose a wallpaper
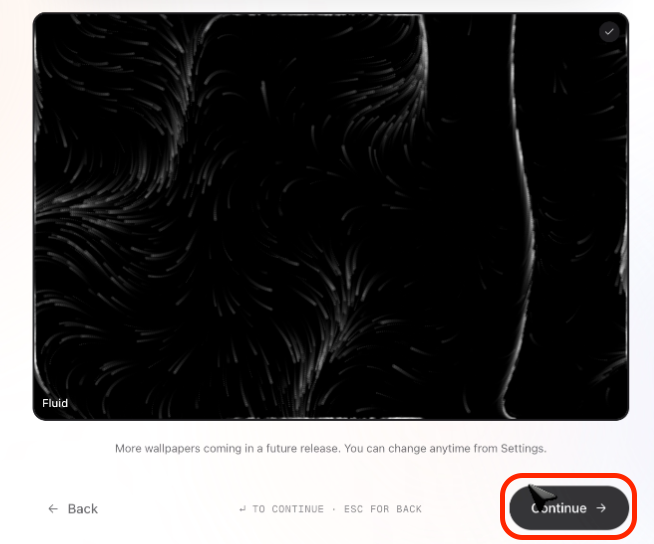
Pick a wallpaper for your Livinity desktop. You'll see a live preview as you choose, so you can find a look you like. (You can always change it later.)
Step 4 — Set your location and language
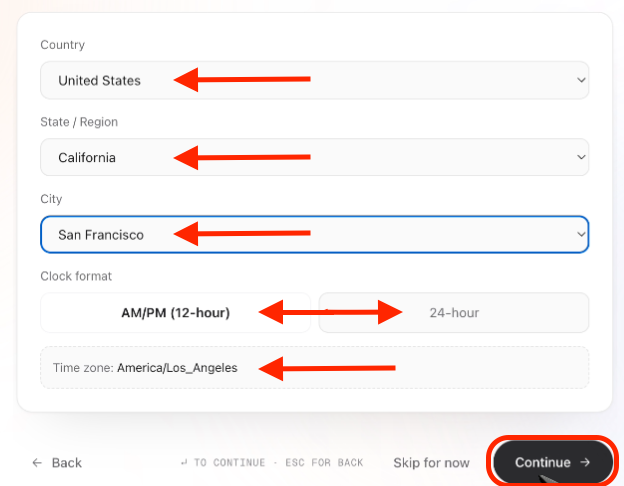
Tell Livinity where you are so it can get your time and formatting right. Choose your country and city (this sets your time zone automatically), pick your language, and choose whether you prefer 12-hour or 24-hour time.
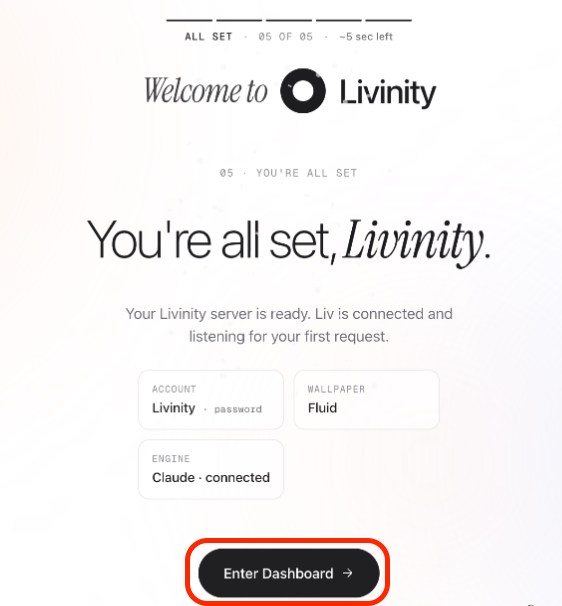
Step 5 — All set!
That's it — you'll see a quick summary of your choices, and you're done. Livinity drops you onto your new desktop, ready to use.
Need to step away mid-setup?
No problem. If you close the wizard before finishing, Livinity remembers where you were. Next time you open it, a "Welcome back" banner lets you pick up right where you left off — or start over from the beginning.
You're in — what's next?
Welcome to Livinity! From your new desktop you can:
- Meet Liv, your built-in AI assistant — just start a conversation.
- Open the App Library and install your first app from the catalog.
- Explore your dashboard and make it your own.
That wraps up getting started. Enjoy your new Livinity!